
Mastering the Crown: The Hardest Part of 360 Waves Explained
Mastering the Crown: The Hardest Part of 360 Waves Explained: For anyone on the “wave length,” you know the drill: the hours of brushing, the compression from the durag, and the constant hunt for the perfect pomade. But as your waves start to connect around the sides and top, you eventually hit the final boss of hair grooming—The Crown.
The crown is the epicenter of your pattern, the point from which every single wave originates. It’s the difference between a “decent” set of waves and a truly elite, “spinning” 360 pattern. Here is why the crown is the hardest part to master and how you can finally get it to close.
Why the Crown is a Challenge
The crown is notoriously difficult because hair grows in a natural swirl, or “cowlick,” pattern. Unlike the flat surfaces of your forehead or the back of your head, the crown requires extreme precision.
The crown area of the head is notoriously challenging to cut due to the natural swirl pattern of hair growth, often referred to as a “cowlick.” This presents a unique difficulty, as the hair in this region does not lie flat as it does on the forehead or the back of the head. Instead, it tends to grow in different directions, requiring a high level of precision and skill when cutting. Achieving a neat and polished look at the crown necessitates careful attention and technique to ensure that the hair blends seamlessly with the surrounding areas.
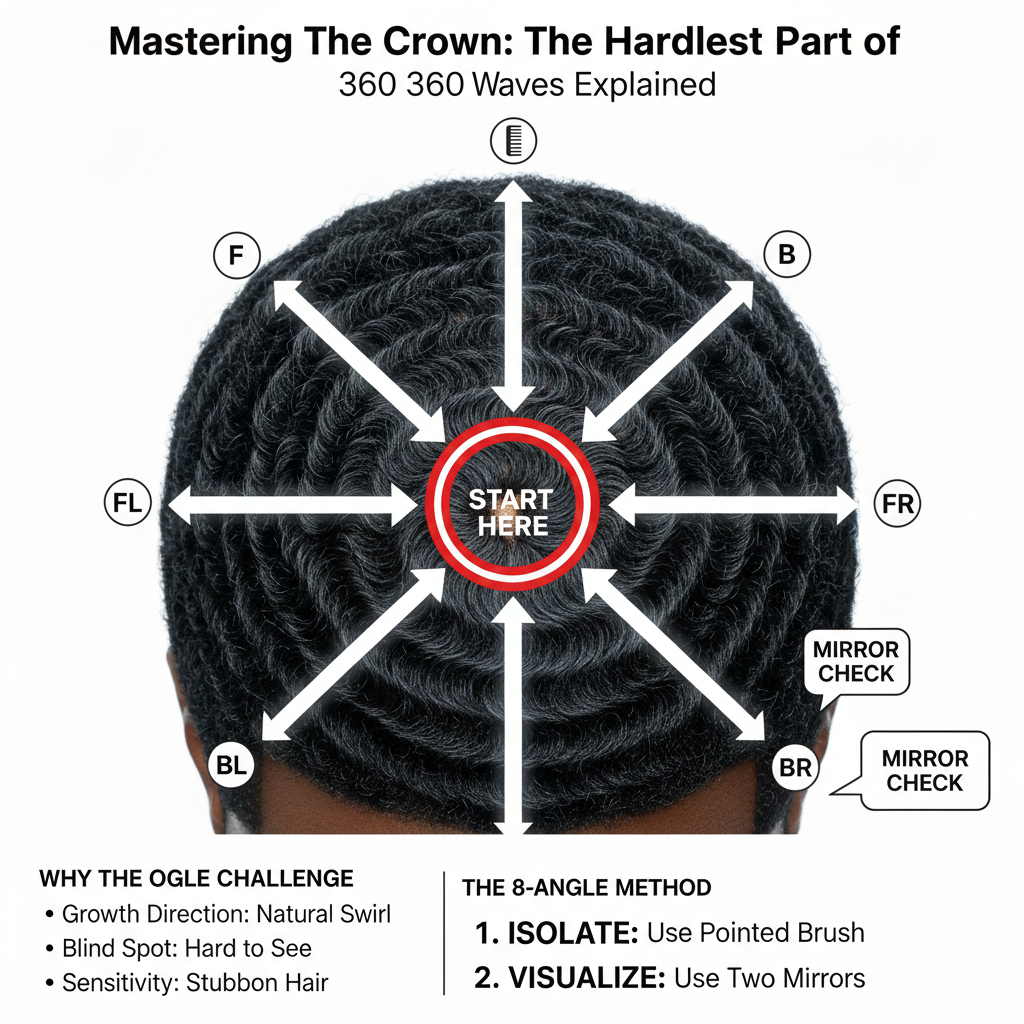
- Growth Direction: The hair at the crown of the head grows in various directions simultaneously. This means that instead of all the hair growing in a single direction, each strand can follow its own path, which can affect how styles are achieved and how the hair lies. Brush in the direction of the swirl outward.
- Blind Spot: It is the most difficult part of your head to see, making it easy to miss at the wrong angle.
- Sensitivity: The hair at the crown is often thinner or more stubborn, meaning it takes longer to “train” than the rest of your head.
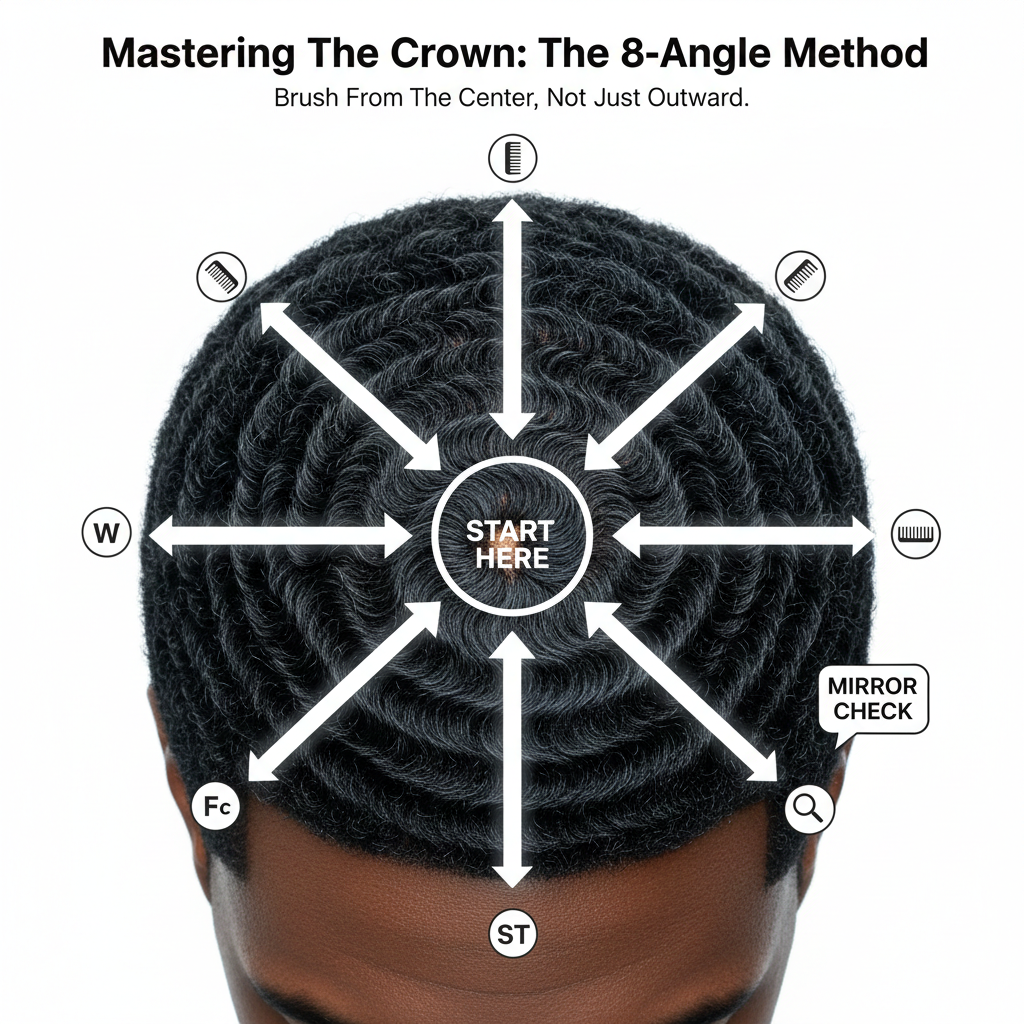
The Secret: The “Eight-Angle” Method
To master the crown, you have to stop thinking of your hair as one unit and start thinking of it as a compass. You shouldn’t just brush “outward”; you need to brush strictly from the center point.
| Step | Action | Tip |
| 1. Identify | Find your natural swirl using a hand mirror and a bathroom mirror. | This is your “source code.” |
| 2. Isolate | Use a pointed crown brush or the tip of your brush to hit the center. | Avoid using the flat side of a large brush. |
| 3. Angle | Brush away from the center in 8 distinct directions. | Consistency is more important than speed. |
Pro-Tips for a Flawless Finish
“The crown isn’t won during the haircut; it’s won during the wolfing session.”
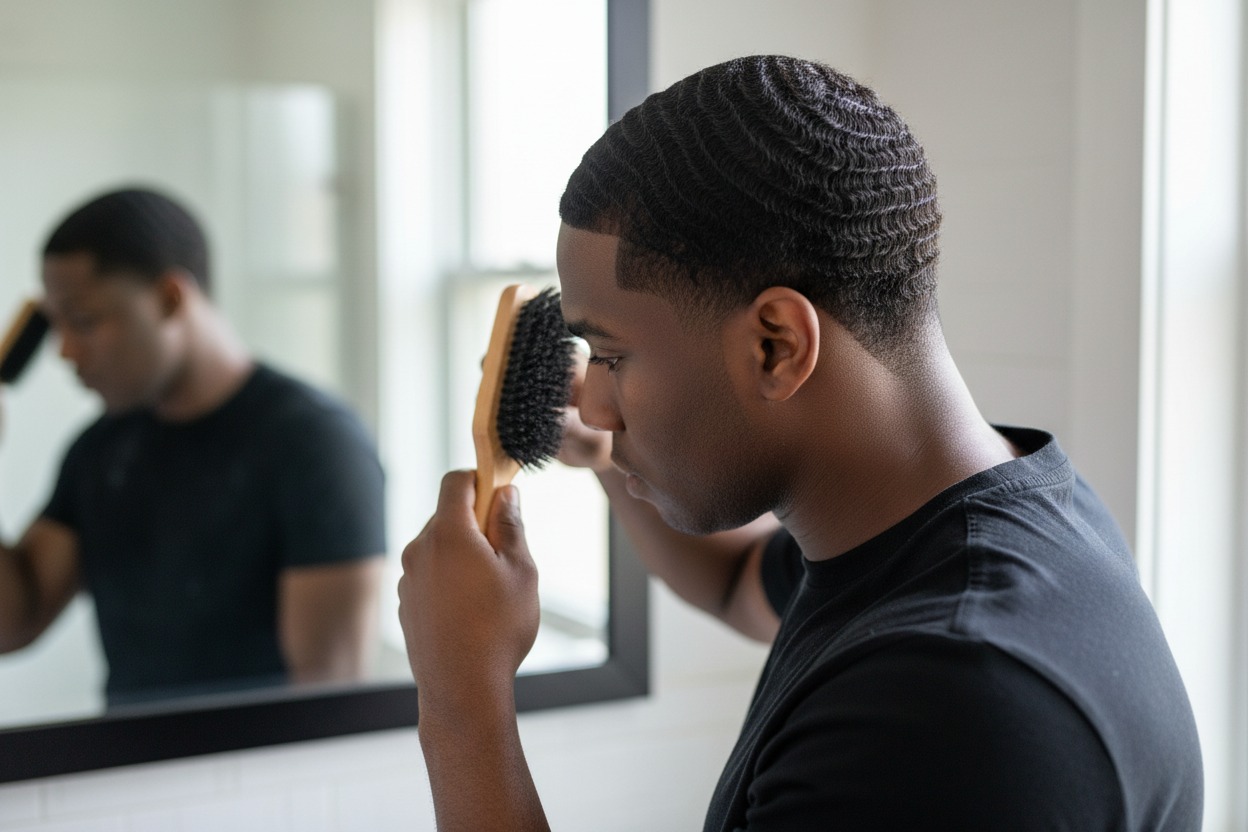
- Mirror Work is Mandatory: You cannot “feel” your way to a perfect crown. You must use a two-mirror setup to ensure every stroke starts exactly at the center point.
- The Crown Patch: Many wavers use a “crown patch”—a small piece of fabric placed under the durag specifically over the crown—to provide extra compression and keep the hair flat.
- Pointed Brushes: Invest in a brush with a contoured or pointed tip. Using a wide, flat brush at the crown often results in “overlaps” or “forks,” ruining the symmetry of the pattern.
The Verdict
Mastering the crown takes patience. While your side waves might pop in a few weeks, a closed, swirling crown can take months of dedicated isolation. Stay consistent, keep your angles sharp, and remember: the crown is the signature of an elite waver.
Detailed Brushing Schedule And The Best Types of Brushes for Crown Isolation
To get that crown spinning, you need to move away from general brushing and into isolation training. Because the hair at the crown is more stubborn, your schedule needs to reflect a “center-out” philosophy.
Here is a specialized brushing routine and the gear you’ll need to close that gap.
1. The Crown-First Brushing Schedule
Most wavers make the mistake of brushing the crown last when their arm is tired. Flip the script: The crown gets your best energy.
Daily Routine (30–45 Minutes Total):
- Warm-Up (5 mins): Apply a warm, damp towel to the crown to soften the hair. Apply a light moisturizer or crown oil.
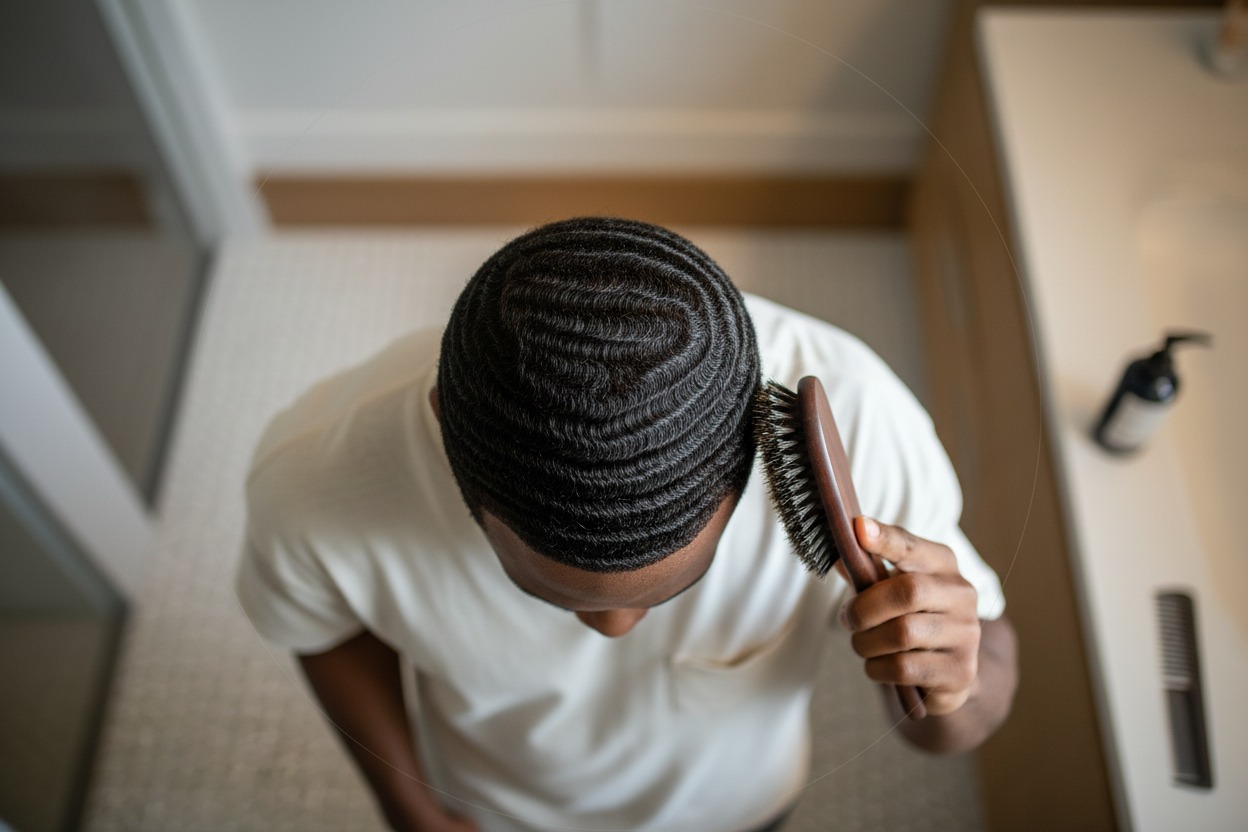
- The Isolation Phase (15 mins): Use a pointy-tip brush. Using your two-mirror setup, start exactly at the center. Brush outward in slow, deliberate strokes. If you have a “swirl” pattern, follow the curve; if you have a “beehive,” brush straight out.
- The Connection Phase (15 mins): Use your medium brush to blend the crown into the rest of your 360 waves. Ensure your angles don’t overlap, or you’ll create “forks.”
- The Finishing Phase (5 mins): Use a plastic sandwich bag (the “plastic bag method”) to lay down the frizz at the crown before putting on your durag.
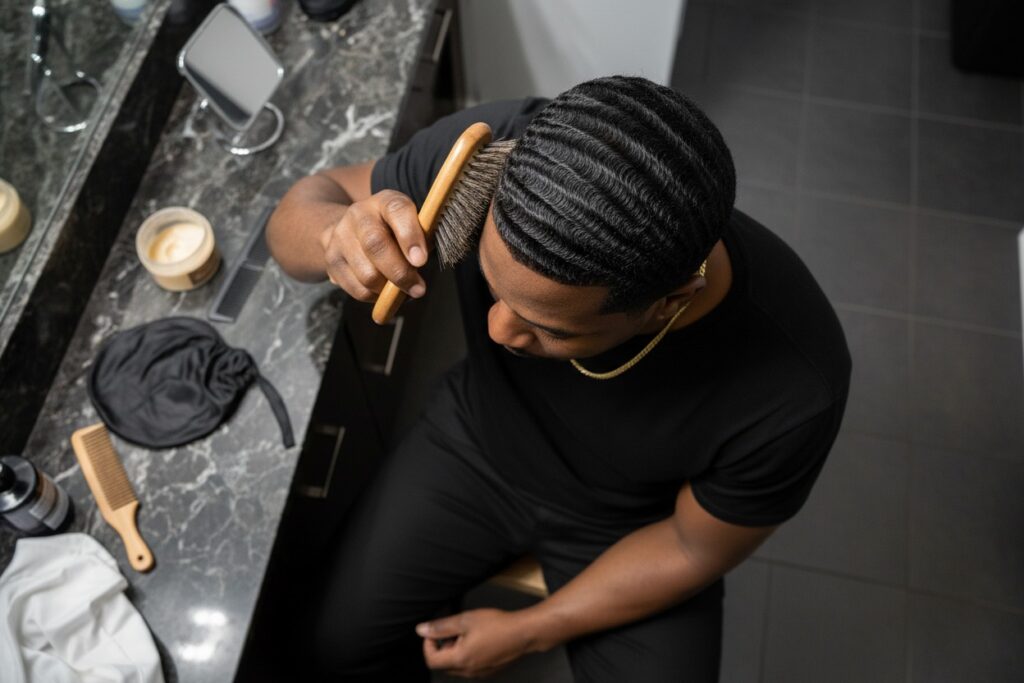
2. The Elite Tool Kit
Standard brushes are too wide for crown work; they hit hair you’ve already brushed, causing messiness. You need precision tools.
| Tool Type | Purpose | Why It Works |
| Pointed/Contoured Brush | Crown Isolation | The “pointed” tip allows you to hit the very center without disturbing the surrounding waves. |
| Soft Toothbrush | Ultra-Detailing | Great for “training” the very first 1/2 inch of hair right at the scalp’s center. |
| Crown Patch | Compression | A small circular patch (velvet or silk) placed under the durag to apply targeted pressure. |
| Hand Mirror | Visibility | Non-negotiable. If you can’t see the center, you are guessing, not brushing. |
More 360 Waves Tips
- Mastering the Crown: The Anatomy of a Perfect 360 Crown
- Mastering the Crown: The Hardest Part of 360 Waves Explained
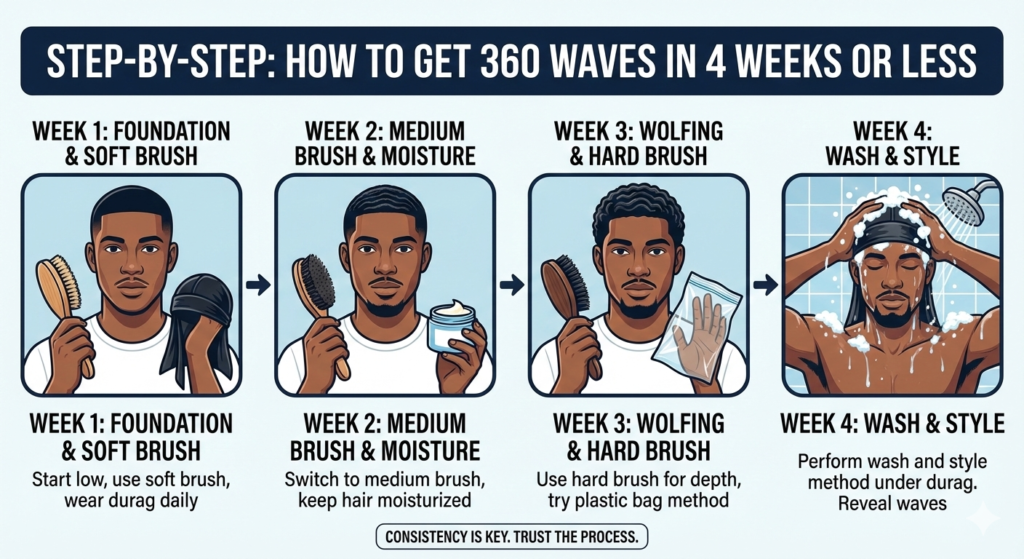
- Step-by-Step: How to Get 360 Waves in 4 Weeks or Less
- Wolfing to Greatness: Fast-Track Your 360 Waves

- Mastering 360 Waves: When to Use a Soft 360 Wave Brush
Discover more from King Scorpion 360
Subscribe to get the latest posts sent to your email.