How to Get 360 Waves Using a Perm
If you’re looking to achieve a flawless 360 wave pattern and want to speed up the process, using a perm can be a game-changer. A perm helps to loosen your natural curl pattern, making it easier to train your hair into the iconic wave style. However, it’s important to approach this method carefully to avoid damaging your hair. In this blog post, we’ll break down the steps to get 360 waves using a perm while keeping your hair healthy.
What Are 360 Waves?
360 waves, often called simply “waves,” are a popular hairstyle where the hair is trained to form a ripple-like pattern that circles the head. Achieving this style usually requires consistent brushing, moisturizing, and wearing a wave cap or durag. Traditionally, the process can take weeks or months, but a perm can help soften your hair and speed things up.
What Is a Perm?
A perm, which stands for “permanent wave,” is a chemical treatment designed to alter the natural curl pattern of your hair. This process involves using chemicals to break down the bonds in your hair, allowing you to reshape it into a different style. In the context of creating 360 waves, a perm can be particularly beneficial. Many individuals with tightly coiled or curly hair find that these curls can be challenging to manage and style.
By getting a perm, you can loosen those tight curls, which not only makes your hair more manageable but also facilitates the wave-forming process. When the curls are more relaxed, it becomes easier to lay the hair down flat and achieve the desired wave pattern.
Overall, a perm can be an effective tool for those aiming to create 360 waves, helping to enhance the look and texture of your hair while making it simpler to work with. However, it’s essential to consult with a professional stylist to ensure the treatment is suitable for your hair type and to achieve the best results.
Step-by-Step Guide to Getting 360 Waves with a Perm
1. Prepare Your Hair
Before applying a perm, make sure your hair is in good condition. Perms involve strong chemicals that can dry out or damage your hair if it’s not healthy. Follow these steps to prepare:
- Wash your hair with a gentle, sulfate-free shampoo to remove dirt and buildup.
- Deep condition your hair to ensure it’s moisturized and strong.
- Trim any split ends to minimize breakage.
2. Choose the Right Perm Kit
Select a perm kit that’s designed for your hair type. There are different formulations for coarse, medium, or fine hair. Consult with a professional stylist if you’re unsure which product is best for you.
3. Apply the Perm
It’s highly recommended to go to a professional for this step to avoid mistakes. However, if you’re doing it at home, follow the instructions on the perm kit carefully:
- Section your hair into small parts for even application.
- Apply the perm solution evenly, avoiding your scalp to prevent irritation.
- Let the perm sit for the recommended time (do not exceed this time to avoid over-processing).
- Rinse thoroughly and apply the neutralizer to stop the chemical process.
4. Start Brushing Immediately
Once the perm is complete, your hair will be softer and more pliable, making it the perfect time to start training your waves:
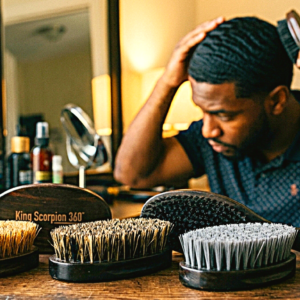
- Use a medium or soft-bristle brush to brush your hair in the direction you want your waves to go. The standard pattern is to brush outward from the crown of your head.
- Brush consistently, dedicating at least 15–20 minutes to each session.
5. Moisturize and Seal
Keeping your hair moisturized is key to maintaining healthy waves:
- Apply a moisturizer or wave cream to prevent dryness.
- Seal the moisture with a light oil, such as argan or coconut oil.
6. Wear a Durag
A durag is essential for locking in moisture and keeping your hair laid down as the waves form. Wear it overnight and during the day if possible to accelerate the process.
Aftercare Tips
- Avoid Overwashing: Wash your hair 1–2 times a week to prevent drying out your waves.
- Reapply Moisture Regularly: Use wave pomade or cream to keep your hair soft and manageable.
- Brush Daily: Brushing is the foundation of 360 waves, so make it a part of your daily routine.
Important Considerations
- Avoid Overusing Perms: Over-processing your hair can lead to damage and breakage, so only use a perm as a one-time or occasional boost.
- Consult a Professional: If you’re new to perms, seek guidance from a stylist to ensure your hair remains healthy throughout the process.
Final Thoughts
Using a perm to get 360 waves can be an effective shortcut, but it requires careful planning and maintenance to achieve the best results. With the right products, techniques, and dedication, you’ll be rocking deep, shiny waves in no time. Remember, patience and consistency are key—even with a perm, your waves will continue to improve the more you brush and care for your hair.
How to Get 360 Waves Using a Perm
If you’re looking to achieve a flawless 360 wave pattern and want to speed up the process, using a perm can be a game-changer. A perm helps to loosen your natural curl pattern, making it easier to train your hair into the iconic wave style. However, it’s important to approach this method carefully to avoid damaging your hair. In this blog post, we’ll break down the steps to get 360 waves using a perm while keeping your hair healthy.
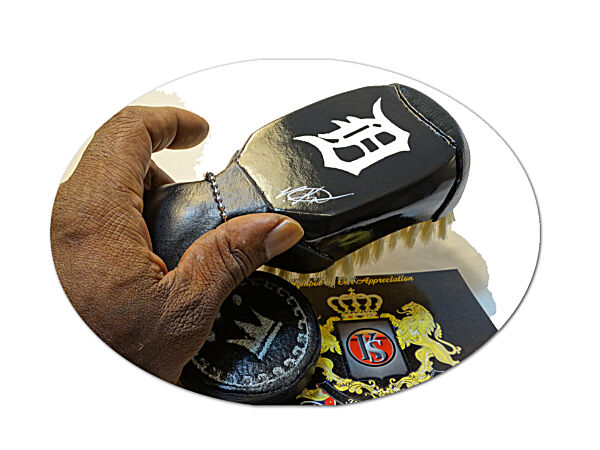
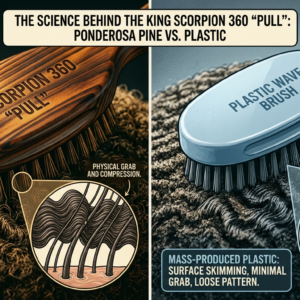
- Ponderosa Pine vs. Plastic: The Science Behind the King Scorpion 360 “Pull”
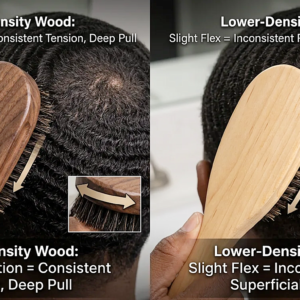
- The Foundation of the Pull: How Wood Density Impacts Your 360 Waves Pattern
- How to Order a King Scorpion 360 Custom Wave Brush
- Why Is the King Scorpion 360 Wave Brush Expensive?
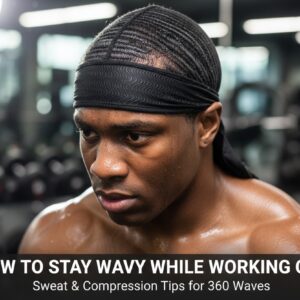
- How to Keep Your 360 Waves Looking Good While Working Out: Sweat and Compression Tips
Discover more from King Scorpion 360
Subscribe to get the latest posts sent to your email.